Showing posts with label painting. Show all posts

Saturday, January 24, 2015

Got A Few Things Done

Here are a few things that I was able to get done from my last post.  


Before
After


What a difference! The bookends turned out fantastic!

Before
After
 You can hardly tell but the one on the left he's a terra cotta color.  And here he is all chalk painted, touched with gold and waxed. I always enjoy making these little guys over. Sometimes after waxing I add just a bit of real blush powder (with a cotton swab) to add a hint of color to the cheeks.

A few of the picture frame skeletons...remember that blue one?

Before
After
Way better now! Those purple painted spots from the before pic bled thru so I had to scrap off the paint, really easy the chalk paint adhered to the purple and it just sort of popped off when I scraped at it. 

This is the paper in back of the previous frame pic. It's the Time Traveler Collection "Love Affair" Prima Marketing Inc. Just picked up yesterday at Memories of Time, my local, well stocked scrapbooking shop.  It's gorgeous...be great for Valentines Day projects or just any romantic, sentimental project.
Before
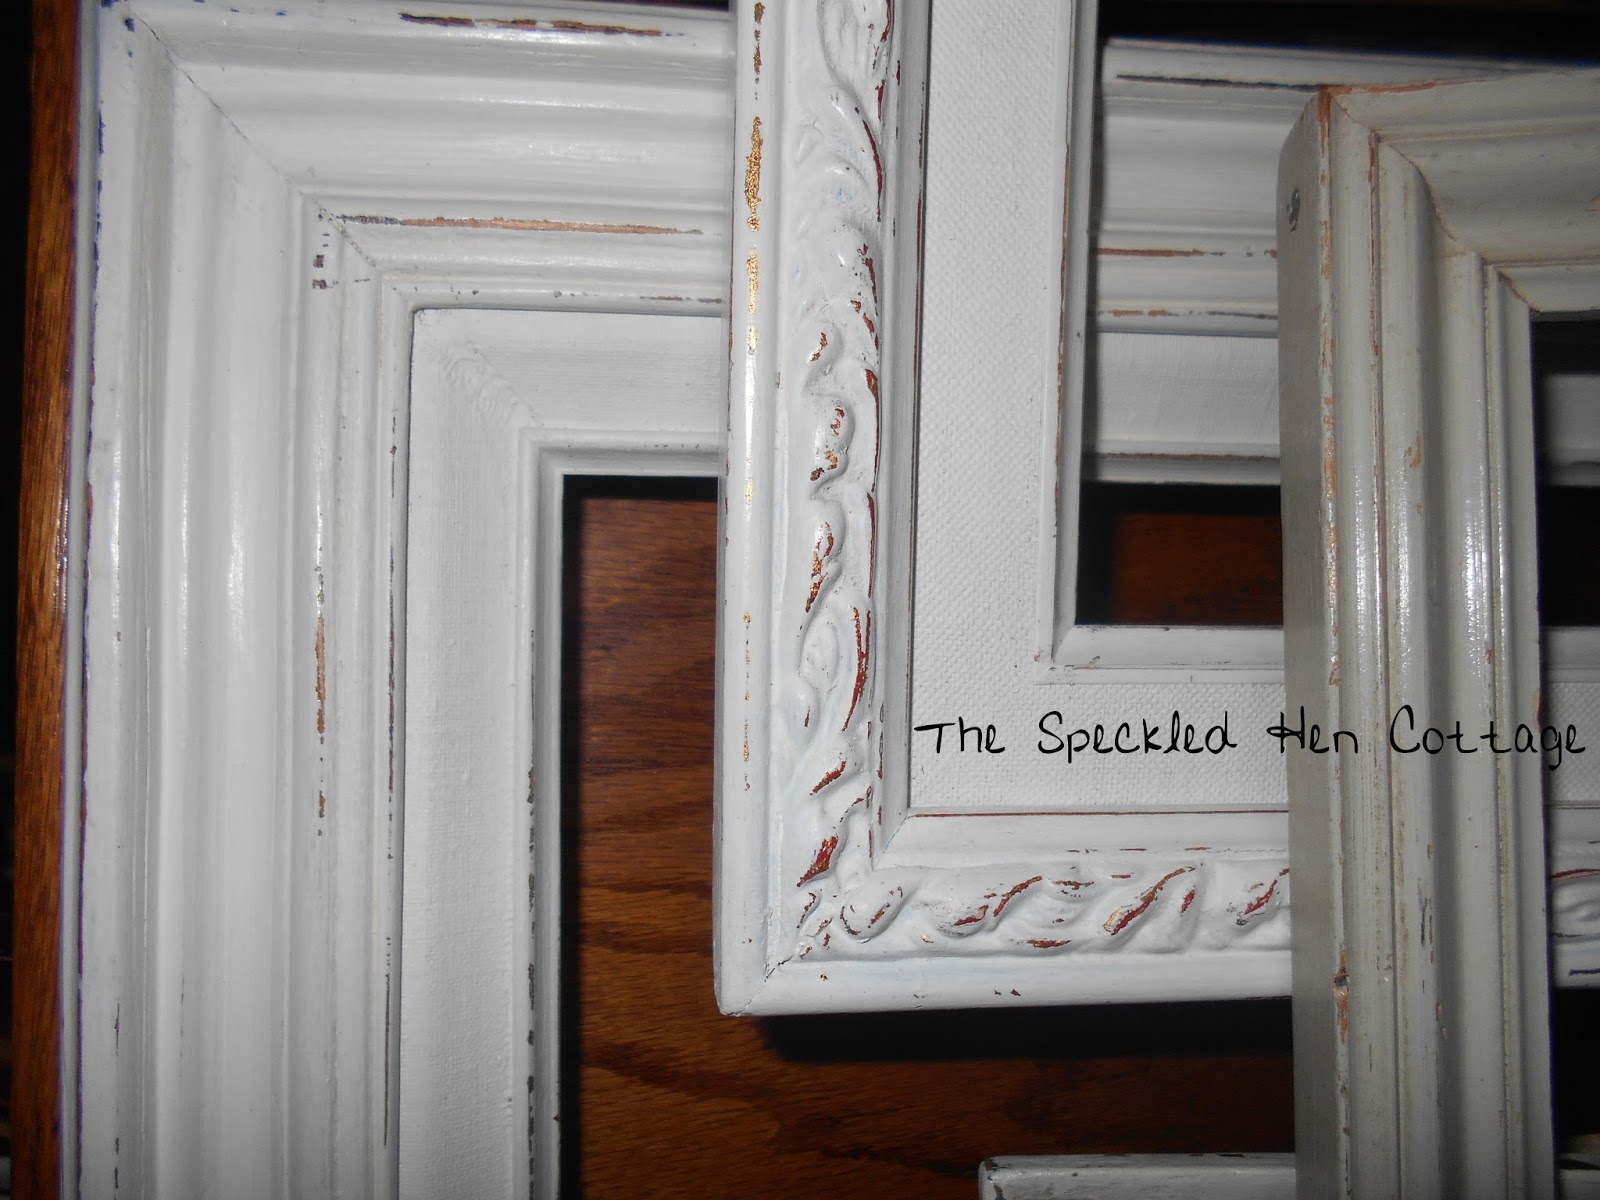
I left the inner liner in and just painted. I've ruined a few frames trying to get the sections apart. Never thought to paint the whole thing. Unfortunately the large dark one in the back turned pinkish from stain bleed through...got to fix it.
After

I really liked how beautifully they painted. I also waxed with clear wax, even the fabric colored liner.  Grey frame just got spiffed up with wax. The more ornate one shows some red that was under the gold.


Here's the desk with the broken pull.
Before
 Much better...but was sort of pain to accomplish. Got the pulls off EBAY, somebody else wanted them as badly as me. Crazy spendy!!! But they were the exact maker and style number that I needed.
After
And having said that...they didn't fit!!! 
At first that is. 

The replacement ones were for a flat front and I needed to fit a slightly curved front. They wouldn't lay flat and I disliked that noticeable gap. So I heated them (almost a boil) in a pan of water and VERY GENTLY shaped them with a pair of pliers. Heating sort of helps prevent the metal from snapping into and it also cleaned them very nicely! I used tongs to take them out of the water and an old towel to hold them. I also used a brass brush on them it helps to polish very nicely.

After
After I got the new ones put on I thought the single drawer pull needed "beefing" up a bit. This one is larger and has more gold to match with the others.


The desk is finished on the outside, just need to line the drawers with pretty paper. It's headed to the shop Monday morning!!! 
~~~Have a wonderful weekend~~~

Sharing at the following...please join me.
Ivy & Elephants
My Salvaged Treasures

Thanks for popping in!!!
~~~Happy Hunting and Gathering~~~

Wednesday, December 31, 2014

One Last Makeover For 2014

I'm going to squeak one more post in before 2015.  I decided at the last minute to freshen up the bookcase and the bathroom. I've been wanting to get this done for quite sometime.  So I rolled up my sleeves and set to work!!! It's been a grueling few days---but I'm so Happy with the results.

Up first is the built in book case.  I did this paint and stencil treatment back in 2001...so it was time for a re-do.
I liked the stenciling, but you really couldn't see it when all the books were in place. My dad built this and I never really wanted to paint the wooden shelves that he had lacquered. But time had taken it's toll on them and they need to be re-lacquered or painted.  I can't do lacquer...I don't even use oil based paint. I knew I wanted to go lighter and brighter. So I rummaged around in my surplus supply of paint and came up with a light grey pint of latex miss-matched paint.

Liking it already! Let's fill  those shelves up!!!


There's the bookshelf all done~~~and to the left is a wee glimpse of the bathroom. Ready for a tour?

Here's a few before pics. Starting at the entrance...this finish (lacquered) has seen better days!


This cabinet isn't getting a makeover this time...still like it as is~~~
and the rugs staying.


You can't tell, but the walls are a taupe color.
 

See that beautiful gown the damsel in the middle is wearing? That color inspired my paint choice. A rosy, slightly peachy tone.


And here they are, my Benjamin Moore paint choices . Chantilly Lace for the trim and Rose Reflection for the walls, well it was suppose to be Rose Reflection but the test patch was way to pink for that tiny space. So I added white and it's between Pink Swirl and the RR, on three walls. And added more white again so it's Pink Swirl on the fourth big wall.
~~~And here's the finished space~~~
 

 The medicine cabinet got an update with a couple of coats of Chantilly Lace. 
After adding this pic to the post I realized I had forgot to change out the little night light.
 Now that's better!

The picture in the background is a very large and vintage post card of
Glastonbury Abbey in England. The book under the lamp is a 1915 edition of Scott's Lady of the Lake and is inscribed "Miss Alice Ekblad, Marshfield, Oregon. It was a volume from the local high school that I also attended some 50 year later...Marshfield High School.


This shelf is a new addition above the sink, it was gold colored - now it's white and distressed a bit. A perfect place for a Frog Prince to sit!

 This shelf used to be under the knight and damsel picture, it got freshened up with a coat of white paint and a little distressing.


 The pink glass Eiffel Tower was a gift from a dear friend
 who visited Chicago last Autumn.

The shelf is different here, this is how I bought it. Had it stored (of all places) under my bed!

 ~~~I absolutely adore Italian Florentine boxes~~~
I only buy them when I'm out thrifting, which limits my finds!!!


 This sword use to be above the window.

 
 Switched the old hook out for this crown...goes with the royal theme!

I transformed this little table years ago, the medallion is plaster of paris. I made a mold in clay of the original and casted this one myself, then attached the crystal and glued it in place! 

The small picture is an Italian Florentine with convex glass.
My grand daughters make these little nests out of grass during the fall.

 Yes, those are rhinestone clip earrings gathering up the valance. 

Well that's my major makeover for the year, like I said just squeaking it in. I'm loving the new light and refreshed look of everything.  The only thing I bought for this makeover was the paint, everything else I already had. So this was a very budget friendly re-do!!!

Sharing at the following...please join me

Thank you for popping in~~~
Happy New Year!!!